DIY paper palm leaves step by step. DIY paper palm spears tutorial with pictures and video. Paper palm fronds tutorial. In the following article, we will you the easiest method to make paper palm leaves for home decor.

DIY paper palm leaves step by step
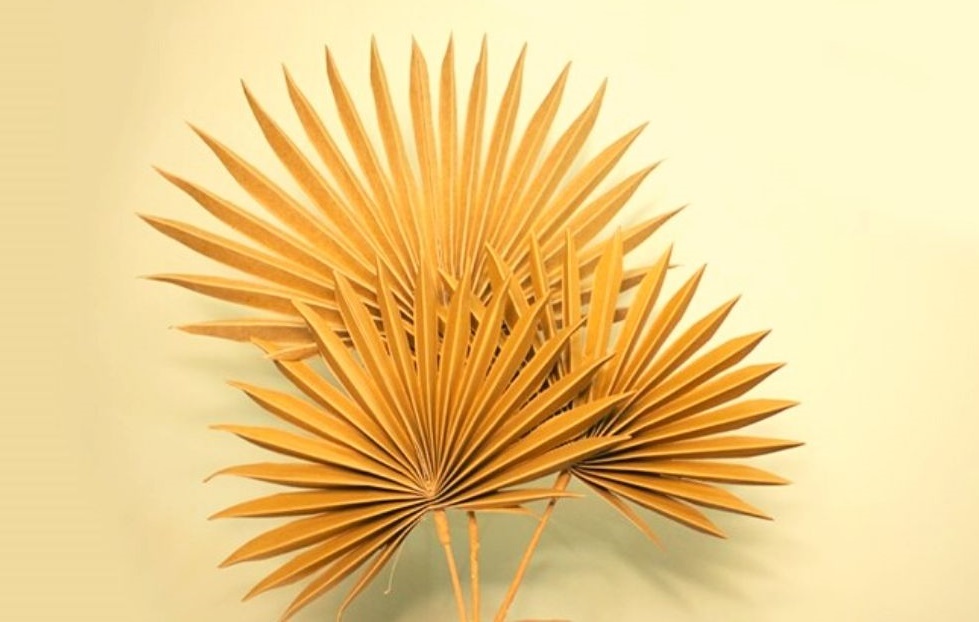
Nowadays dried palm leaves are trending, these paper palm leaves look so classy and give an elegant, earthy and tropical touch to your home decoration, so why not make its paper version. Save lots of money by DIY palm leaves.
You can place these paper palm leaves in a vase, or you can hang them on the wall, or tie them in the shape of a wreath to use them as a bohemian lampshade. Basically, you can use these paper palm spears for many other projects. So let’s start the tutorial.
Supplies needed to make the paper palm leaf
- Brown Colored Paper (Chart paper or Cratefini Crepe Paper) – Buy here A4 size, 160/170gsm paper
You can use any colour to make these leaves, make sure the paper is thicker than the normal paper to give the leaves a more spiky and sharp look. I used brown-coloured paper because it gives boho earthy vibes.
- Scissor
- Thin crepe paper to wrap the wooden skewer and to create a stem base.
- Glue or Hot Glue
- Wooden skewers
Before you start you might want to watch the paper palm leaf video tutorial here
DIY paper palm spear tutorial with pictures and video
Step One


Cut along the drawn line.


Cut your paper 15 inches in length and 13 inches wide. Then fold it in half and draw a kind of half oval shape.
Cut along the drawn lines as sown in the picture.
Step Two


Tightly fold your leaves and mark the centre of your fan leaf. Now start fan folding the paper like the way we make paper fans. Fold the paper from the flat bottom to the end. Tightly fold your leaves and mark the centre of your fan leaf.
Step Three


Once all the holes are created, take out the needle and start inserting the wooden skewer through the holes created.


Now take a big needle or anything similar to that and start creating small holes so our wooden skewers can fit easily. Start inserting the needle from the centre as shown below. Once all the holes are created, take out the needle and start inserting the wooden skewer through the holes created.
How to make paper palm leaves tutorial
Step Four
Fold the ends of your fan leaf, the wooden skewer will be in between these two halves of the fan leaf. Apply hot glue in the centre on the wooden skewer as well as on the edges then stick them together.


It will look like this after sticking the two halves.

It will look like this after sticking the two halves.
You might like to learn how to make this gorgeous rose paper flower bouquet – Click here for tutorial

Step Five
Now to give it a spiky look, start cutting palm edges to create tips. Just follow the pictures shown below to cut the perfect spiky leaves shape.


After cutting the leaves shape, slightly bend the pointy side of the leaves to give it a natural look.


You might like to read:
How to make paper flower bouquet step by step tutorial
DIY Paper bicycle step by step with pictures
Easy Christmas crafts to make and sell for profit
Pampas grass decor ideas for indoor and outdoor
Step Six
Now take thin crepe paper and cut a strip about 1.5cm wide and wrap it around the wooden skewer. Use the paper in the same colour in which you have made the palm leaves.


Step Seven
Now it’s time to make “the stem base” by wrapping the same crepe paper near the bottom fold of the leaf as shown below.


And you are done!
Here I have created three palm leaves, the bigger one in the centre is more in the lightest shade of brown colour. Another cool paper project is the gift bag tutorial for Father’s Day. Check it out here.


If you enjoy this paper tutorial, please pin any image you like.
Please do not copy my tutorial or part of it. You can use 1 single image if you want to include it in a round-up post. A link back to this tutorial is mandatory. Thank you.
DIY paper palm fronds
Don’t forget to subscribe to CreativeGiantHands YouTube channel for more papercraft tutorials and cooking videos.


Disclaimer: This article contains affiliate links which means I might receive a commission if you choose to purchase from my referral link at no extra cost to you.

