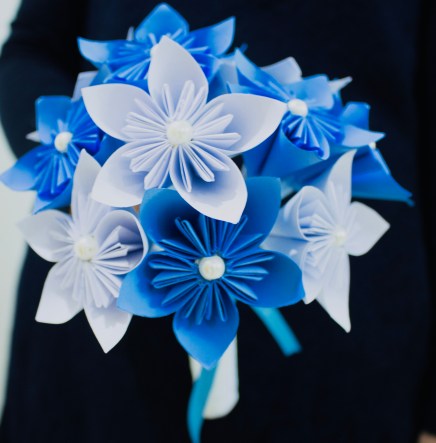
How to make paper flower bouquet step by step tutorial. A step by step tutorial to make origami paper flower bouquet for mother’s day. Make paper flowers at home and sell them on Etsy.

This Beautiful Flower Bouquet is made of Kusudama origami flower, a kind of origami that is made of several identically folded pieces that are glued together to make a spherical shape. This flower bouquet is comparatively simple to make, but sure to impress all of your family and friends.
Whether you have a passion for crafts or a school project and you want to impress your teachers or want to offer this flower bouquet to someone you love, it will surely surprise anyone who will receive it. Make sure to check our website homepage for more DIY tutorials.
Also, you might like to check the pompom wreath tutorial from scratch, which is very easy to make and if you manage to market it wisely, you can make some extra money by selling it.
Pompom wreaths are very popular during the festive season, birthday parties, and wedding decorations. Another page that you might like checking out is how to upcycle old wine glass bottles and turn them into real pieces of art.
If you prefer you can watch the video tutorial here
How to make paper flower bouquet step-by-step tutorial
Another reason for learning how to make a paper flower bouquet might be that you want to sell them on Etsy. With a beauty like this prepare to work hard to make plenty of paper flower bouquets because they are going to sell like fresh bread.
The following origami paper flower bouquet is easy and a real pleasure to make, so gather a piece of paper and write down all the tools that you need and pin any image you like to remember this project easily.
Let’s start the origami flower tutorial.
Materials needed to make the paper flower bouquet

- Paper (Blue and White)
- Glue
- Hot Glue
- White Pearls
- Straws (Blue and White)
- Scissor
- Ribbons (Blue and White)
- Clear Tape
Step 1 for making paper flower bouquet
To make the origami flower you will need five separate sheets of 7.5cm x 7.5cm square paper. You can use origami paper, scrapbook paper, or any kind of paper, just cut the size you prefer. Bigger size paper will result in bigger petals and vice versa.

Step Two
Fold the paper diagonally to make a triangle. Make sure you crease it well.

Step Three
Now take each of the bottom corners and fold it to the top corner as demonstrated below.


Step Four
Then fold the left and right corners down to meet the edge of the paper.


Step Five
Unfold the flap you created before and make a squash fold and squash that flat and then crease it.


Step Six
Fold down the top triangles of both sides.

Step Seven
Fold the left corner on itself so it meets the first side crease. Repeat with the right corner.


You might like to read:
DIY paper palm leaves step by step
DIY Paper bicycle step by step with pictures
Easy Christmas crafts to make and sell for profit
Last-minute DIY Christmas gifts ideas
Step Eight
Now glue your flower petal together. Repeat until you have a total of five flower petals.


Step Nine
Now take any kind of glue and apply a thin layer at the top edge of the piece about half a centimeter to a centimeter wide.

Step Ten
Start assembling all the petals, line up the edges and press them together.


We have finished making a single paper flower.

Your beautiful Kusudama Flower is ready!
Now make nine blue flowers and nine white flowers. The more flowers you make the bigger will be the bouquet, it’s completely up to you how many flowers you want in your bouquet.

Step Eleven
Now use hot glue and glue the pearls in the center of all the flowers.


Step Twelve
Take the straws and make three cuts in the opening of straws around 0.5cm long as shown below.


I have used white straws for white flowers and blue for blue flowers.
Step Thirteen
Now put some glue at the top of the straw and at the bottom of the flower and glue them together. After gluing them together hold steady for a few seconds.


Step Fourteen
Now start arranging the flowers in order to form the shape of a bouquet.

You can also use wooden skewers instead of straws but the best thing about straws is that you can easily bend them to shape the bouquet.

Cut the extra length

Step Fifteen
Now take clear tape and wrap it around the straws.


Step Sixteen
Now wrap the white ribbon around the straws and then take a blue ribbon to make a bow on the top.

Wrap around the paper flower handlers with the white ribbon until is fully covered.

Beautifully covered all bouquet handle with white ribbon.

Tie up the top of the bouquet with a blue ribbon and make a cute bow.


And your beautiful flower bouquet is ready!


I hope you enjoy making this beautiful origami paper flower bouquet and I would love to know your opinions and suggestions.
Please credit this page if you want to use this tutorial! A do-follow link is required if you want to use the step-by-step tutorial for making paper flower bouquet.


Disclaimer: The post contains affiliate links, which means that I receive a small commission from sales that result from this post, at no additional charge to you. Thank you for supporting this blog.


